
Mounting a TV on a concrete wall is an excellent way to save space and create a sleek, modern look in your home. However, it requires specific tools and techniques different from those used for drywall or wooden studs. Proper preparation and execution are key to achieving a secure and aesthetically pleasing installation.
Tools and Materials Needed
Essential Tools
- TV Mount Kit: Ensure it includes the wall plate, brackets, and necessary hardware.
- Pencil or Marker: For marking drilling points.
- Electric Drill: With a masonry drill bit suitable for concrete.
- Safety Goggles: To protect your eyes during drilling.
- Hammer: For inserting anchors.
- Screwdriver: For securing the mount.
- Level: To ensure your mount is straight.
- Anchors and Concrete Screws: If not included in your mount kit.
Step-by-Step Installation
Step 1: Preparing the Area
- Determine Mounting Location: Use a piece of cardboard cut to the size of your TV to help visualize and mark the desired mounting area on the wall. Ensure the center of the TV is at your eye level when seated, typically around 42 inches from the floor.
- Check for Obstacles: Make sure there are no electrical wires or pipes where you plan to drill.
Step 2: Marking the Drilling Points
- Position the Wall Plate: Hold the wall plate against the wall at the desired height. Use a level to ensure it is straight.
- Mark the Holes: Mark the screw holes on the wall with a pencil. Ensure they are aligned with the mortar joints between the blocks for added stability.
Step 3: Drilling the Holes
- Drill Pilot Holes: Using an electric drill with a masonry bit, drill pilot holes at the marked points. The depth of the holes should match the length of the anchors you will be using, typically about half an inch deep.
- Clean the Holes: Remove any debris from the holes using a small vacuum or a brush.
Step 4: Inserting Anchors
- Insert the Anchors: Place the anchors into the drilled holes. Tap them in with a hammer if necessary, ensuring they are flush with the wall.
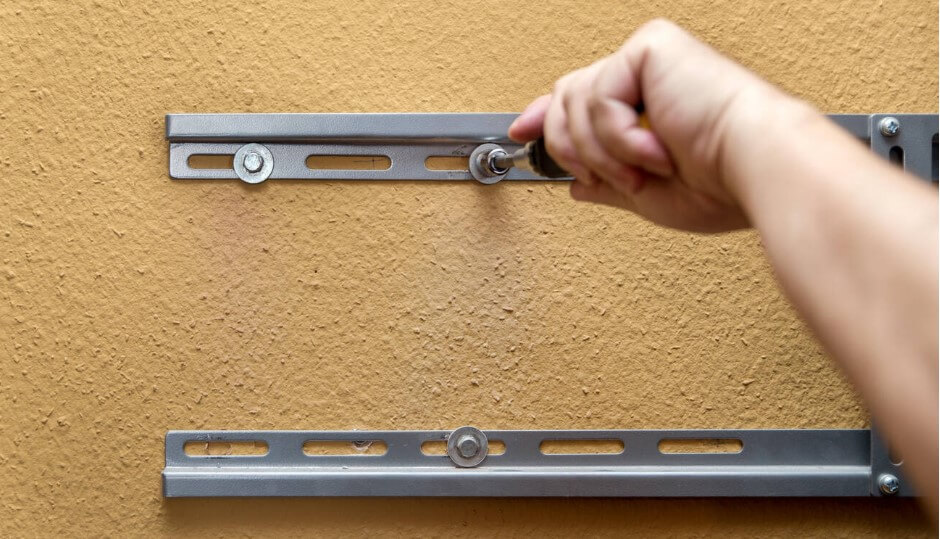
Step 5: Attaching the Wall Plate
- Secure the Wall Plate: Align the wall plate with the anchors and use a screwdriver to drive the concrete screws into the anchors. Make sure the wall plate is securely attached and level.
Step 6: Mounting the TV
- Attach the Mounting Bracket to the TV: Secure the mounting brackets to the back of your TV using the screws provided. Ensure they are tight but do not over-tighten.
- Hang the TV on the Wall Plate: With the help of a friend, lift the TV and hook the mounting brackets onto the wall plate. Carefully slide the TV into place, ensuring it is level and secure.
Cable Management
Concealing Cables
- Plan Your Cable Management: Decide how you will route the cables from the TV to the power source and other devices. Consider factors such as the location of power outlets and the length of the cables to ensure effective cable management.
- Use In-Wall Cable Routing: If possible, route cables inside the wall for a clean look. This may require cutting channels into the concrete.
- Surface-Mounted Cable Covers: If in-wall routing is not an option, use cable covers that can be painted to match the wall color.
Cable Management Accessories
- Cable Ties and Clips: Use these to bundle and secure cables, preventing them from dangling.
- Cable Sleeves and Tubing: These help to organize multiple cables into a single, neat bundle.
Securing the TV to the Wall
Final Steps
- Check Alignment and Stability: Ensure the TV is level and securely attached. Gently push the TV to check for any movement.
- Safety Straps: For added security, especially in households with children or pets, attach safety straps to the TV and secure them to the wall.
Enhancing the Aesthetics
Hide the Mounting Hardware with a Wall Plate
- Wall Plates with Built-In Cable Management: These help conceal the cables, keeping them organized and out of sight.
- Choose a Matching Wall Plate: Select a wall plate that matches the color and design of your wall for seamless integration.
- Adjustable Fittings: Look for wall plates with adjustable fittings to ensure a clean and polished look.
Using Decorative Covers and Trims
- Surface-Mounted Conduit or Raceways: These provide a dedicated pathway for the cables and ensure they are securely hidden. They can be painted to match the wall.
- Baseboard or Crown Molding Routing: Hide the cables behind baseboards or crown molding. This allows for easy access and future changes.
Conclusion
Mounting a TV on a concrete wall requires careful preparation and the right tools. By following these steps, you can ensure a secure and aesthetically pleasing installation. Always take the time to plan your setup and use the appropriate materials to achieve the best results. Enjoy your newly mounted TV and the enhanced viewing experience it brings to your space.