
Mounting your computer monitor has numerous benefits, including saving valuable desk space, improving ergonomic comfort, and creating a more organized and professional-looking setup. However, not all monitors are designed to be mounted. Understanding the compatibility and requirements is the first step in achieving a clutter-free and efficient workspace.
Checking VESA Compatibility
What is VESA?
VESA stands for the Video Electronics Standards Association. This organization sets the standards for mounting flat panel displays, including computer monitors and TVs. VESA compatibility means that your monitor has a standardized hole pattern on the back, which matches the mounting bracket specifications.
- Definition and Purpose
- VESA standards ensure that the mounting hole patterns and sizes are consistent, making it easier to find compatible mounts and accessories.
- These standards include hole spacing patterns such as 75x75mm, 100x100mm, and 200x200mm.
How to Check for VESA Compatibility
Visual Inspection
One of the simplest ways to check if your monitor is VESA compatible is through a visual inspection.
- Look at the Back of Your Monitor
- Check for four screw holes arranged in a square or rectangular pattern. These are typically 75x75mm, 100x100mm, or 200x200mm apart.
- If your monitor has a stand, these holes might be hidden. Remove the stand to inspect the back of the monitor.
Measuring the VESA Pattern
If you find the screw holes, the next step is to measure the distance between them.
- Measure the Distance Between the Holes
- Use a ruler or measuring tape to measure the horizontal and vertical distances between the centers of the holes. This measurement will correspond to the VESA size (e.g., 75x75mm or 100x100mm).
Checking the User Manual or Manufacturer’s Website
Another reliable method is to refer to the user manual or check the manufacturer’s website.
- Refer to Your Monitor’s User Manual
- The manual often includes detailed specifications, including VESA compatibility.
- Visit the Manufacturer’s Website
- Enter your monitor’s model number on the manufacturer’s website to find product specifications, including VESA mounting information.
Finding a VESA Mount
Selecting the Right Mount
Choosing the correct mount involves matching the VESA pattern and considering the monitor’s weight and size.
Matching the VESA Pattern
- Ensure Compatibility
- Verify that the mount matches your monitor’s VESA pattern. Common patterns include 75x75mm and 100x100mm.
Considering Weight and Size
- Check Weight Capacity
- Confirm that the mount can support the weight of your monitor. This information is usually provided in the mount’s product specifications.
Types of VESA Mounts
Different mounts offer varying levels of flexibility and functionality.
- Fixed Mounts
- Ideal for a clean, stationary setup where the monitor’s position doesn’t need to change.
- Tilting Mounts
- Allow for vertical angle adjustments, which can reduce glare and improve viewing comfort.
- Full-Motion Mounts
- Offer flexibility with adjustments in multiple directions, including tilt, swivel, and rotation.
Options for Non-VESA Monitors
Not all monitors come with VESA mounting holes. If your monitor is not VESA compatible, there are alternative solutions.
Using an Adapter
Adapters can convert non-VESA monitors to be compatible with VESA mounts.
Clamp-On Adapters
- Non-Invasive Solution
- Clamp-on adapters attach without screws, making them suitable for monitors that cannot be drilled.
Screw-On Adapters
- Secure Attachment
- These adapters screw into the back of the monitor and then attach to the VESA mount, providing a secure and stable solution.
Adhesive Adapters
- For Light Monitors
- Adhesive adapters stick to the back of the monitor and are suitable for lighter models. Ensure the adhesive is strong enough to support the monitor’s weight.
Purchasing a Monitor Stand with Built-In VESA Mount
Another option is to buy a monitor stand that includes a built-in VESA mount.
Advantages
- Stable and Permanent
- Provides a stable mounting solution that integrates seamlessly with the monitor stand.
- Adjustable Features
- Often includes height, tilt, and swivel adjustments for optimal ergonomics.
Considerations
- Compatibility
- Ensure the stand can support your monitor’s weight and size.
- Functionality
- Look for stands that offer the necessary adjustments to improve comfort and usability.
Types of Mounting Systems
Wall Mounting
VESA Compliant Systems
- Standardized Mounting
- Ensure both the monitor and the wall mount adhere to VESA standards for a secure fit.
Non-VESA Systems
- Using Adapters
- Convert non-VESA monitors to be mountable using adapters.
- Choosing Non-VESA Specific Mounts
- Some mounts are designed specifically for non-VESA monitors.
Desktop Mounting
Using a Monitor Arm
- Flexibility and Space-Saving
- Monitor arms attach to the desk, providing flexibility and saving desk space. They allow for easy adjustments in height, tilt, and swivel.
Freestanding Mounts
- No Drilling Required
- These mounts sit on the desk surface and provide a stable base without the need for drilling or clamping. They are ideal for temporary setups or when drilling is not an option.
Ceiling and Rack Mounting
Ceiling Mounts
- For Larger Monitors
- Ideal for large monitors or specific setups where desk or wall space is limited. Ceiling mounts provide a unique solution for unconventional spaces.
Rack Mounts
- Professional Environments
- Suitable for multiple monitor setups, often used in professional or industrial environments where monitors need to be securely mounted in a rack.
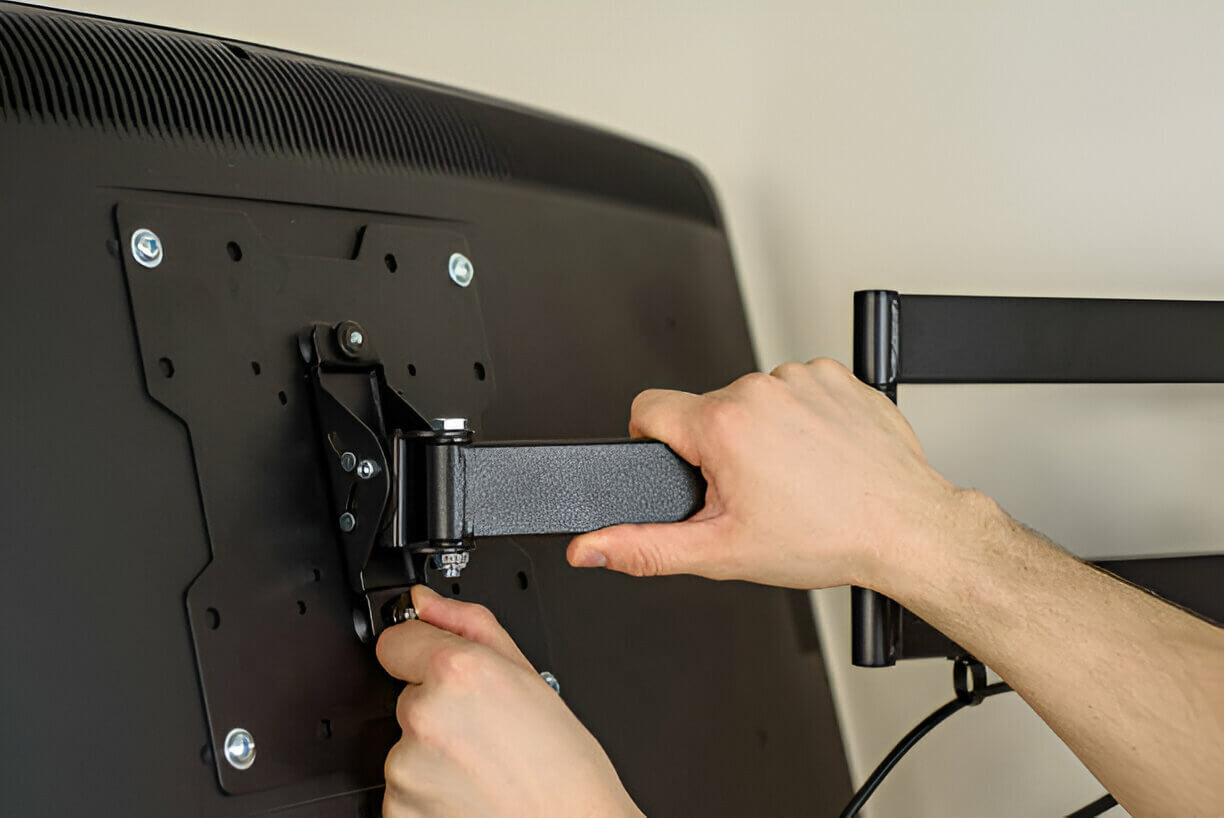
Installation Tips
Proper Installation Steps
Installing your monitor correctly is crucial for safety and functionality.
Tools and Preparation
- Gather Necessary Tools
- You will need tools such as a drill, screwdriver, and measuring tape.
- Locate Wall Studs
- If wall mounting, ensure you locate wall studs to secure the mount firmly.
Step-by-Step Guide
- Mark the Mounting Holes
- Based on your VESA measurements, mark the locations for drilling holes.
- Drill Holes and Secure the Mount
- Drill the holes and attach the mount to the wall or desk using the appropriate screws.
- Attach the Monitor
- Secure the monitor to the mount and adjust it to the desired position.
Conclusion
Mounting your monitor can enhance your workspace by saving space, improving ergonomics, and creating a more organized setup. By checking VESA compatibility, selecting the right mount, and following proper installation steps, you can achieve a clean and efficient workspace.
Whether your monitor is VESA compatible or not, there are solutions available to help you mount it securely and enjoy the benefits of a mounted monitor. Take the time to ensure compatibility and choose the best mounting option for your setup.